


To use this tutorial, you need to have previously read the tutorial on Linux remote desktop connectivity Click here.
Here are the step-by-step instructions for installing the FiveM™ server on Alma Linux.
This step-by-step guide walks you through the installation and configuration of the FiveM™ server on an Alma Linux system. The guide covers updating the system, creating server directories, downloading and extracting the necessary server files, configuring firewall settings, and using txAdmin to manage the server. By following these steps, you will have a working FiveM™ server ready for your gaming sessions.
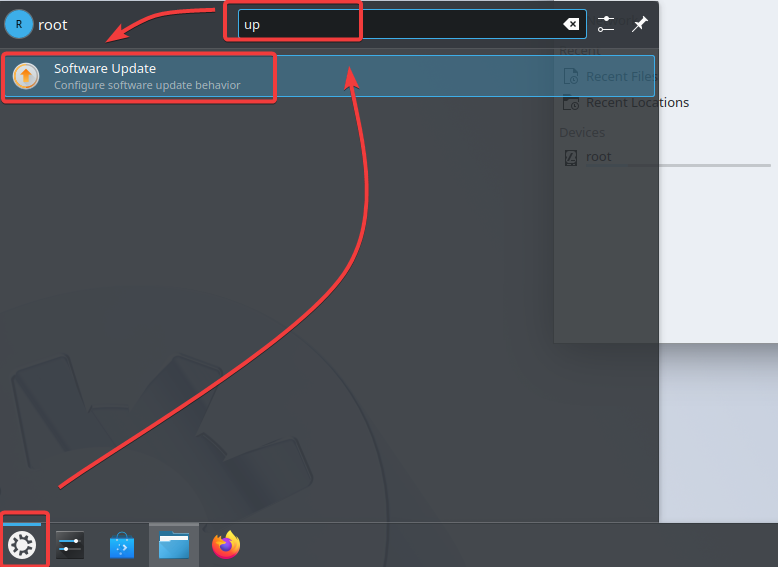
Step 1. Update the sofware
Open search and search for "software udate":
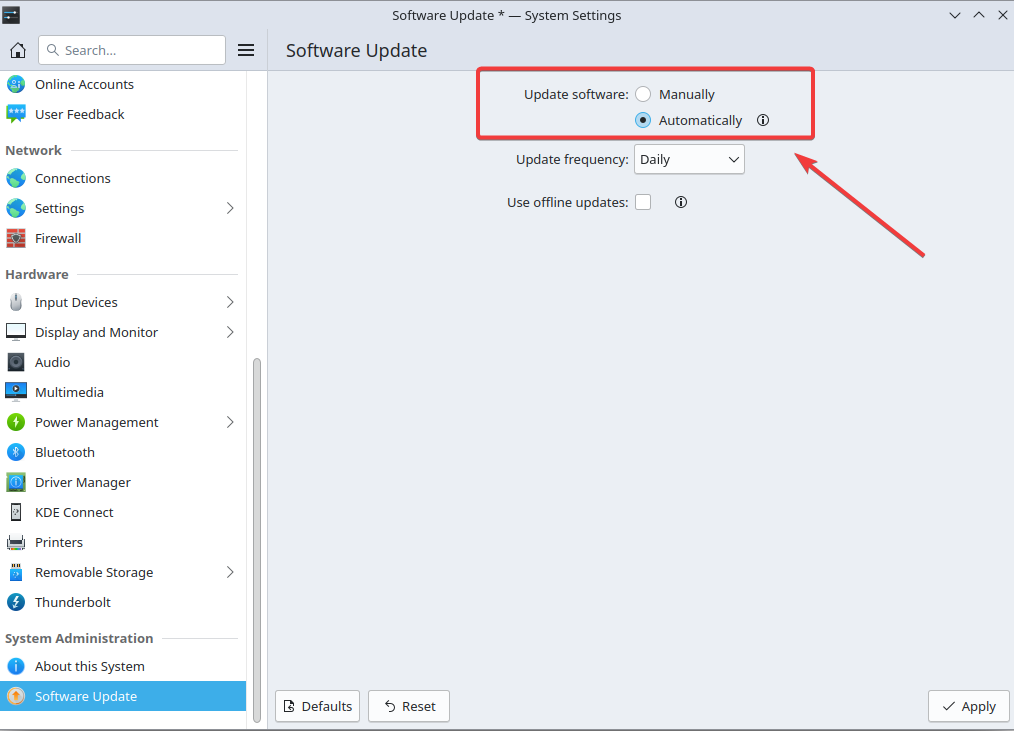
"Software Update" window choose the way u want to update your software click "Automatically" to have your operating system updated automatically and select your desired update frequency under "Update frequency".
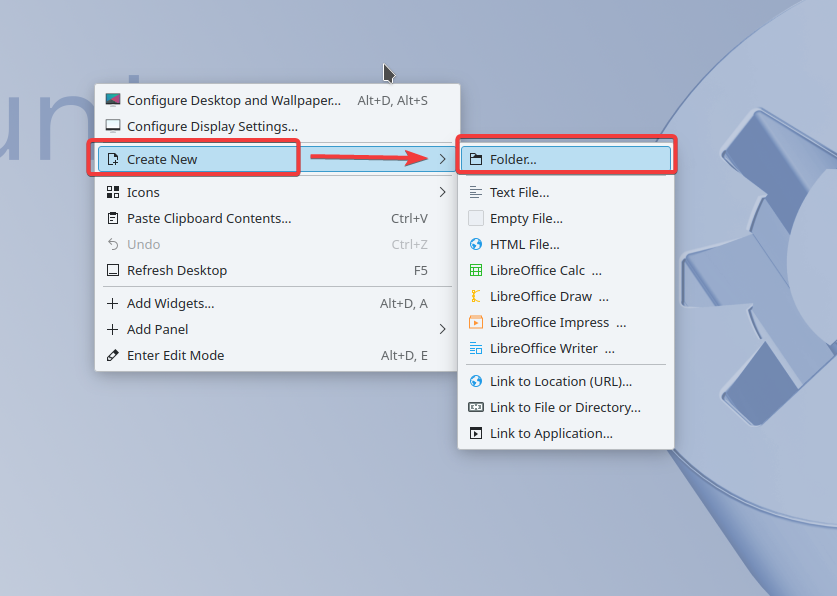
Step 2. Create a directory for your server and download the Linux version of FiveM™
To create a new folder on your Linux desktop, "right-click" on the screen, and a menu will appear. From the menu, select "Create New" and then choose "Folder".
Then you will be presented with a folder naming window, name it for example "My Game Server" then tap "OK".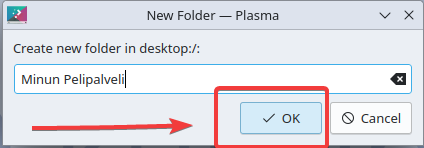
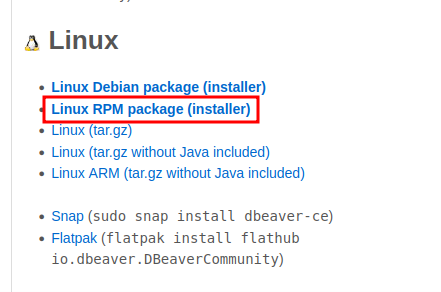
Then we will install the latest FiveM™ server file from the artifacts page open your browser on your Linux computer.
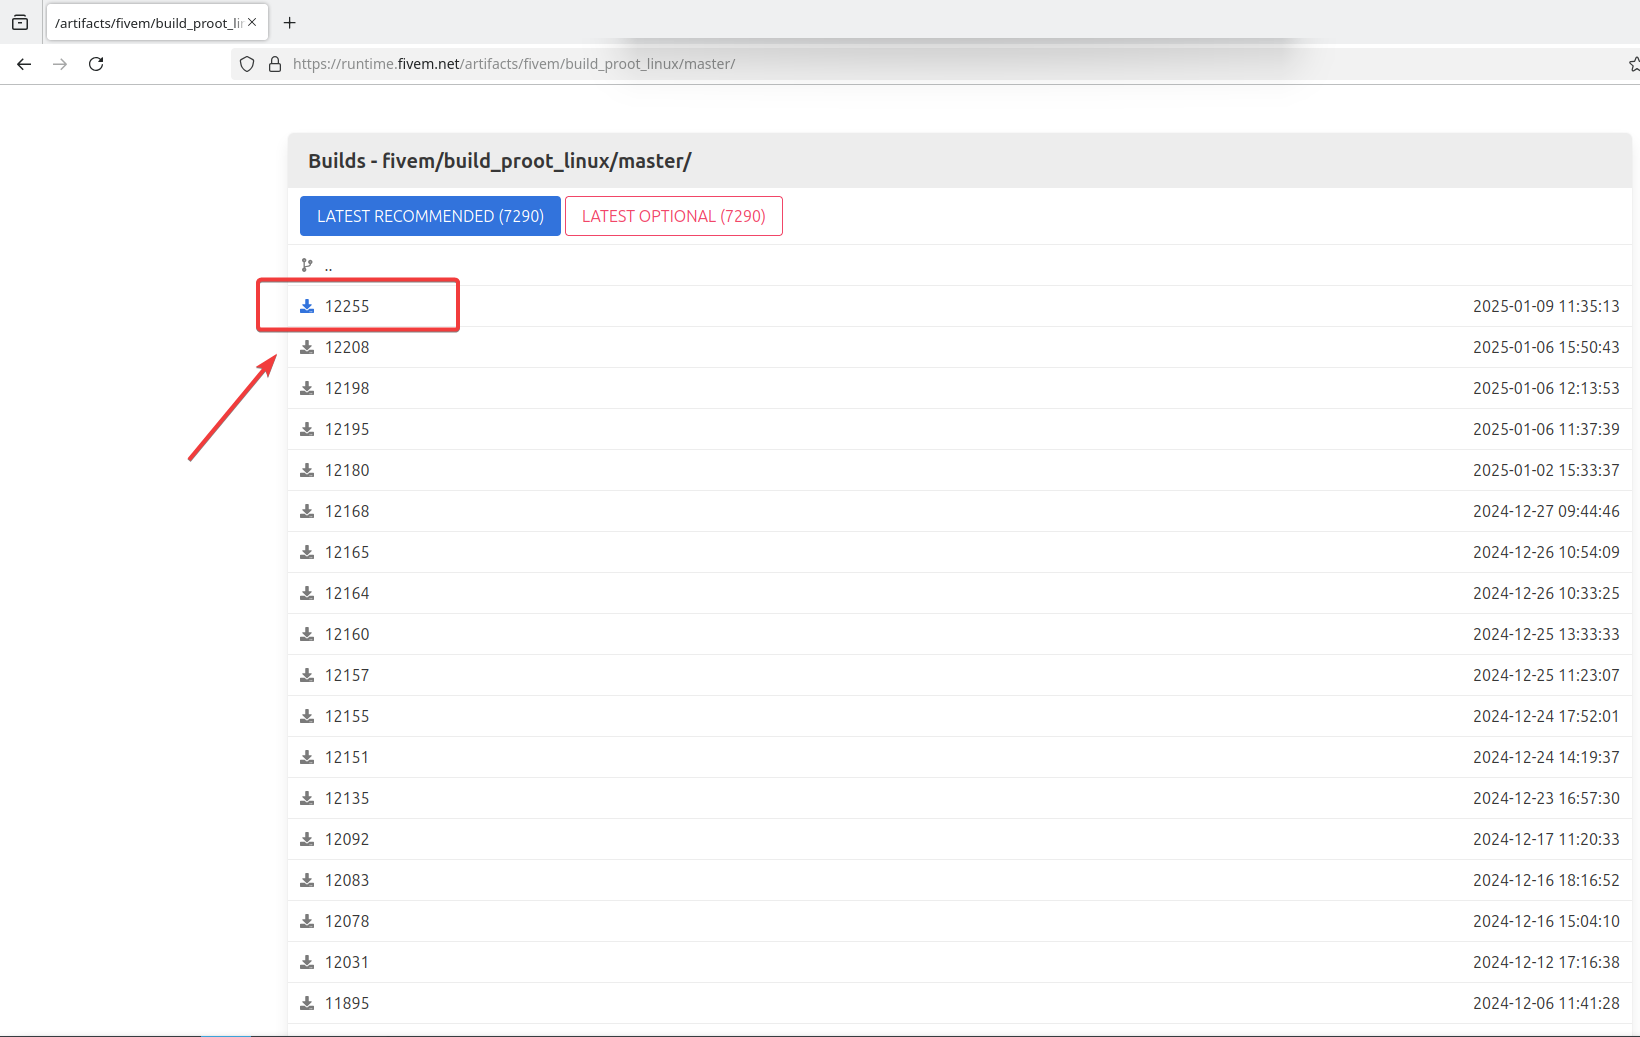
Once you have your browser open, go to the FiveM™ artifacts -website and download the Linux version of the FiveM™ server. From there, click on the latest version to download it and it should start downloading the compressed folder.
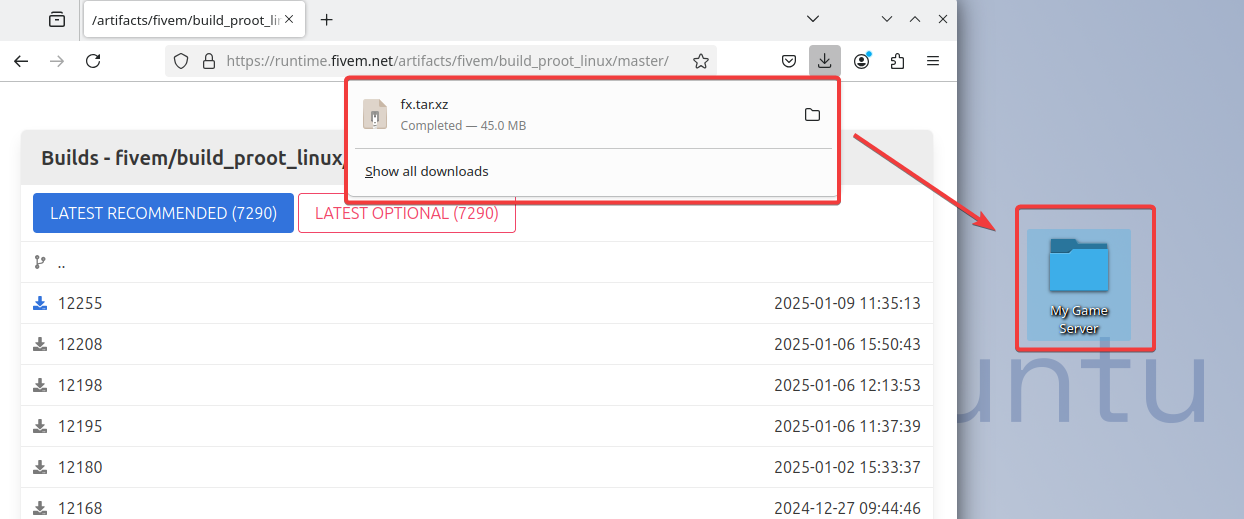
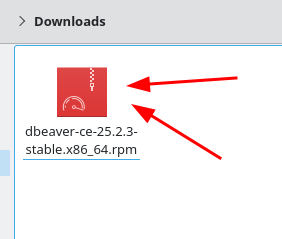
Once the file has downloaded, open the recent downloads in your browser from the down arrow in the top right corner and export the compressed folder to the "My Game Server"-folder.
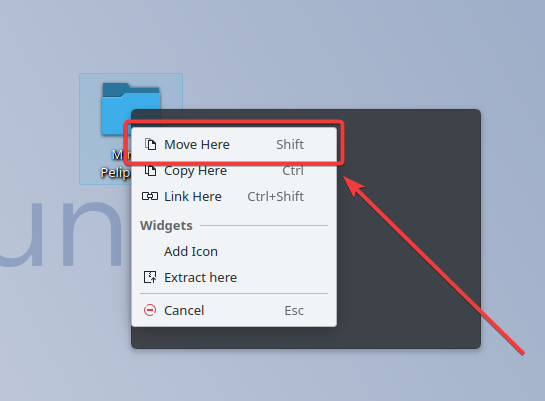
Once you have moved the file on top of the folder click "Move Here".
Once the file is in the folder do not close the browser it will still be needed for the next steps.
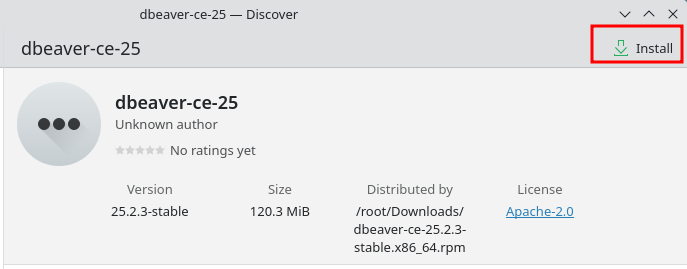
Next, we will install the Engrampa Archive Manager tool for easier extraction. You can install it by opening the software center.
After which you look it up in the upper left corner.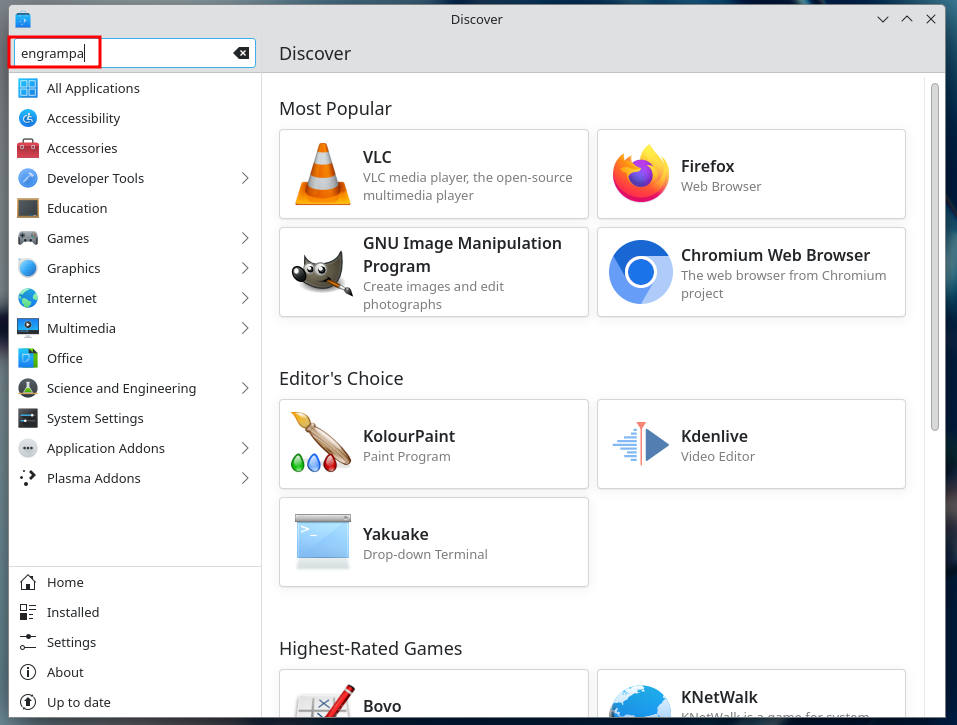
And from there you press Install.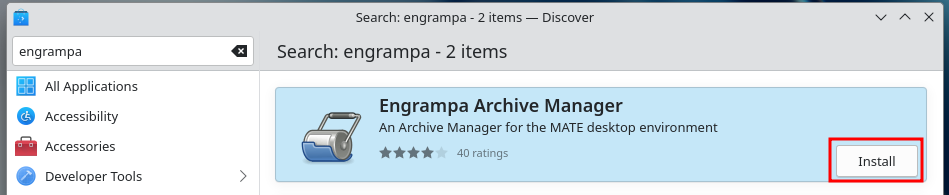
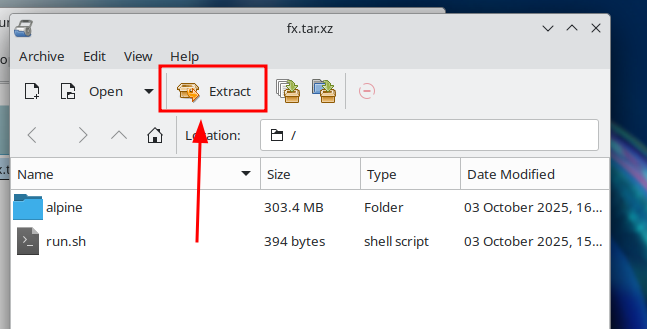
Next, open the "My Game Server" folder by double-clicking on it so that we can unzip the folder. In the folder, right-click on the compressed file you have downloaded and select "Open with Engrampa Archive Manager" in the menu that appears.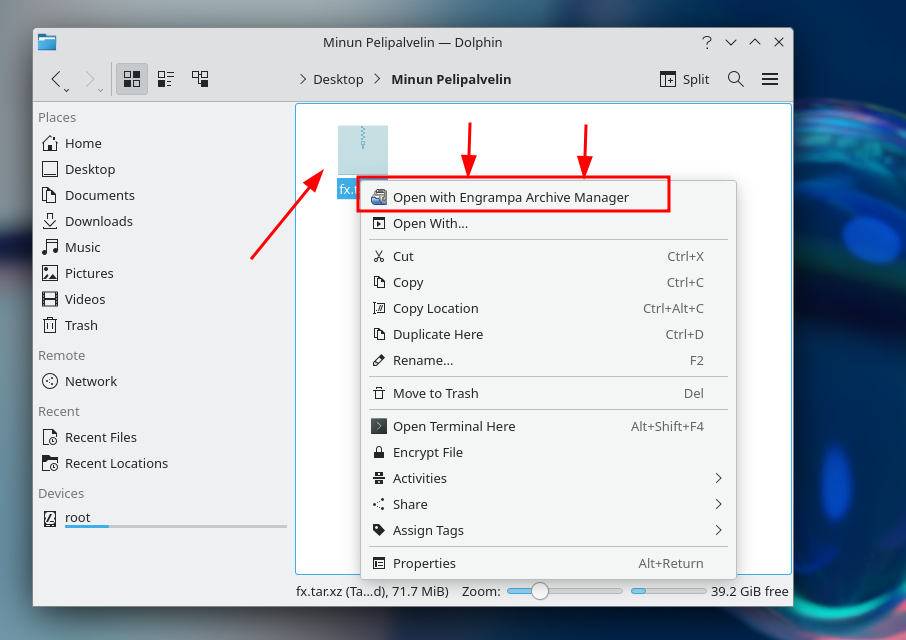
Then wait a few moments for Engrampa to process the file. After processing, it should look like this.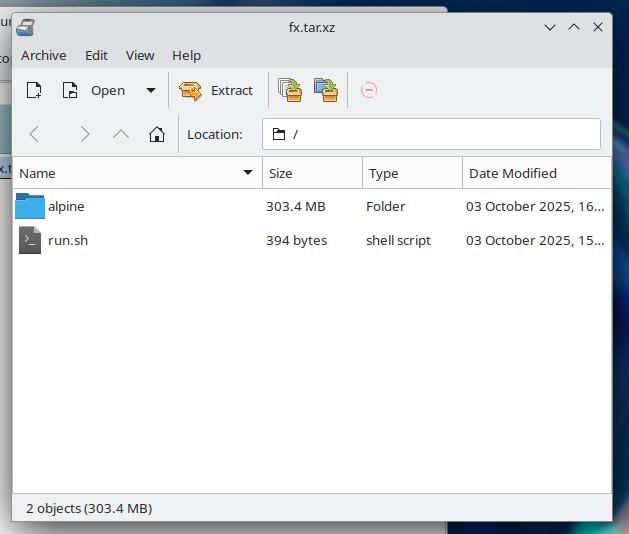
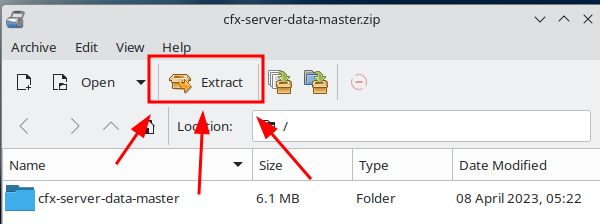
Now let's extract the file then, so press the "Extract" button.
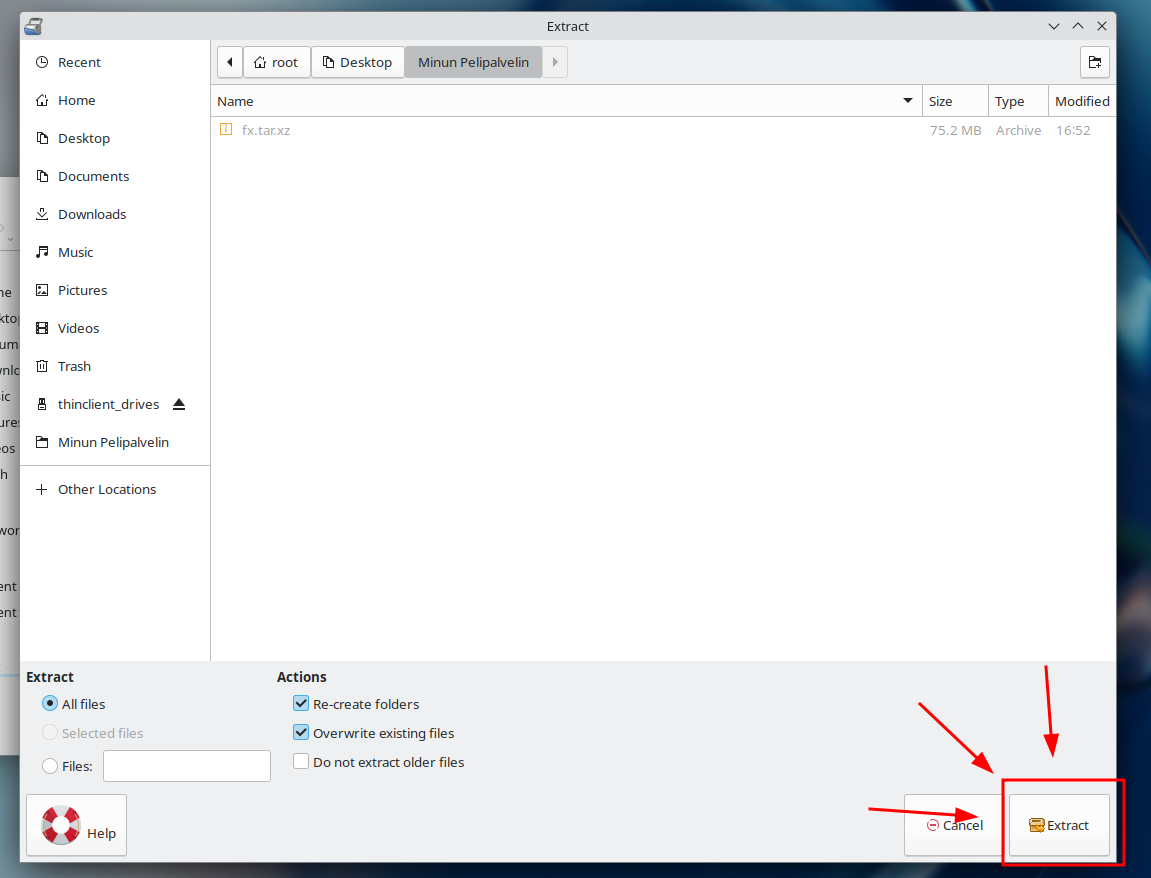
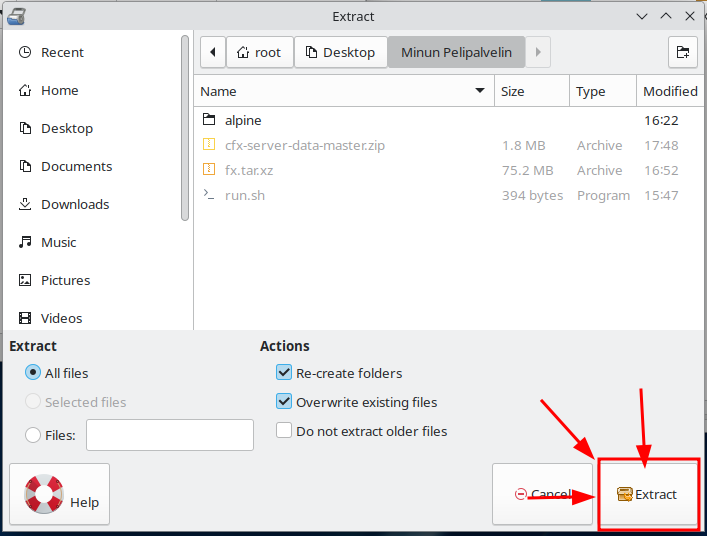
After that, you should see the one in the sample image below, where you press "Extract" once more.
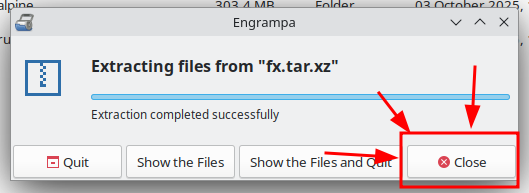
Then wait for Engrampa to unzip the file and you can press "Close" at the end.
If you encountered problems using Engrampa, go to the terminal and from there execute these commands.
cd Desktop
cd My\ Game\ Server
tar -xvf fx.tar.xz
Step 3: Clone the server data files
With the terminal You can also download the files from the GitHub website and move them to the folder itself but now we'll do it the easier way via the terminal.Open the "My Game Server" folder and upload the files there following the instructions below, open your own browser on Linux and paste the link to the file into the search field:
https://github.com/citizenfx/cfx-server-data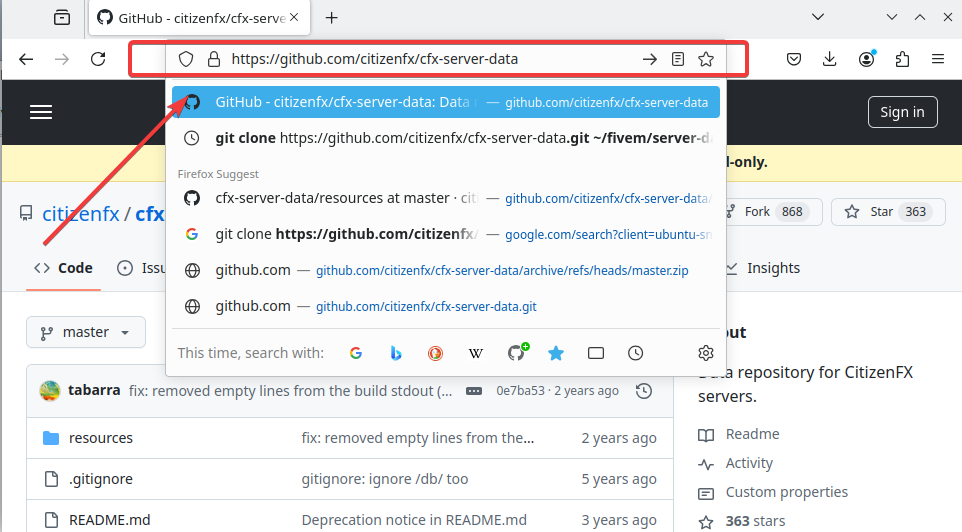
Once you have reached the installation page left click on the "Code" button and in the next menu click on the "Download ZIP" button.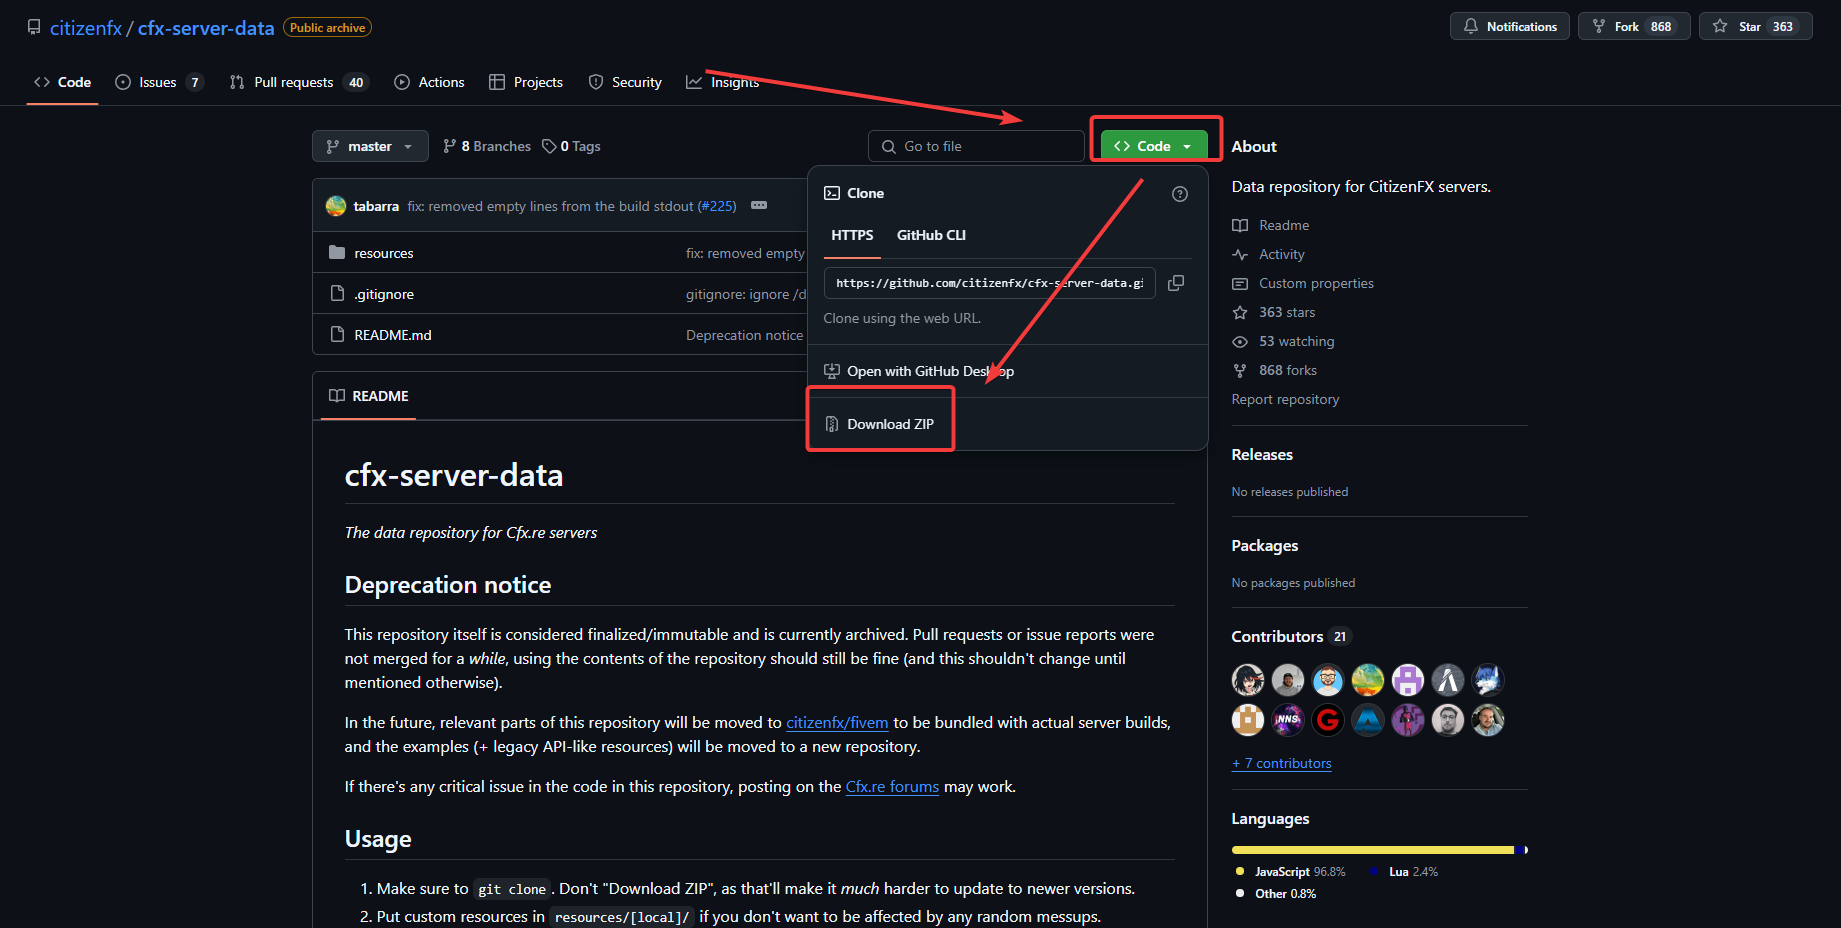
Transfer the file to the "My Game Server" folder you created.
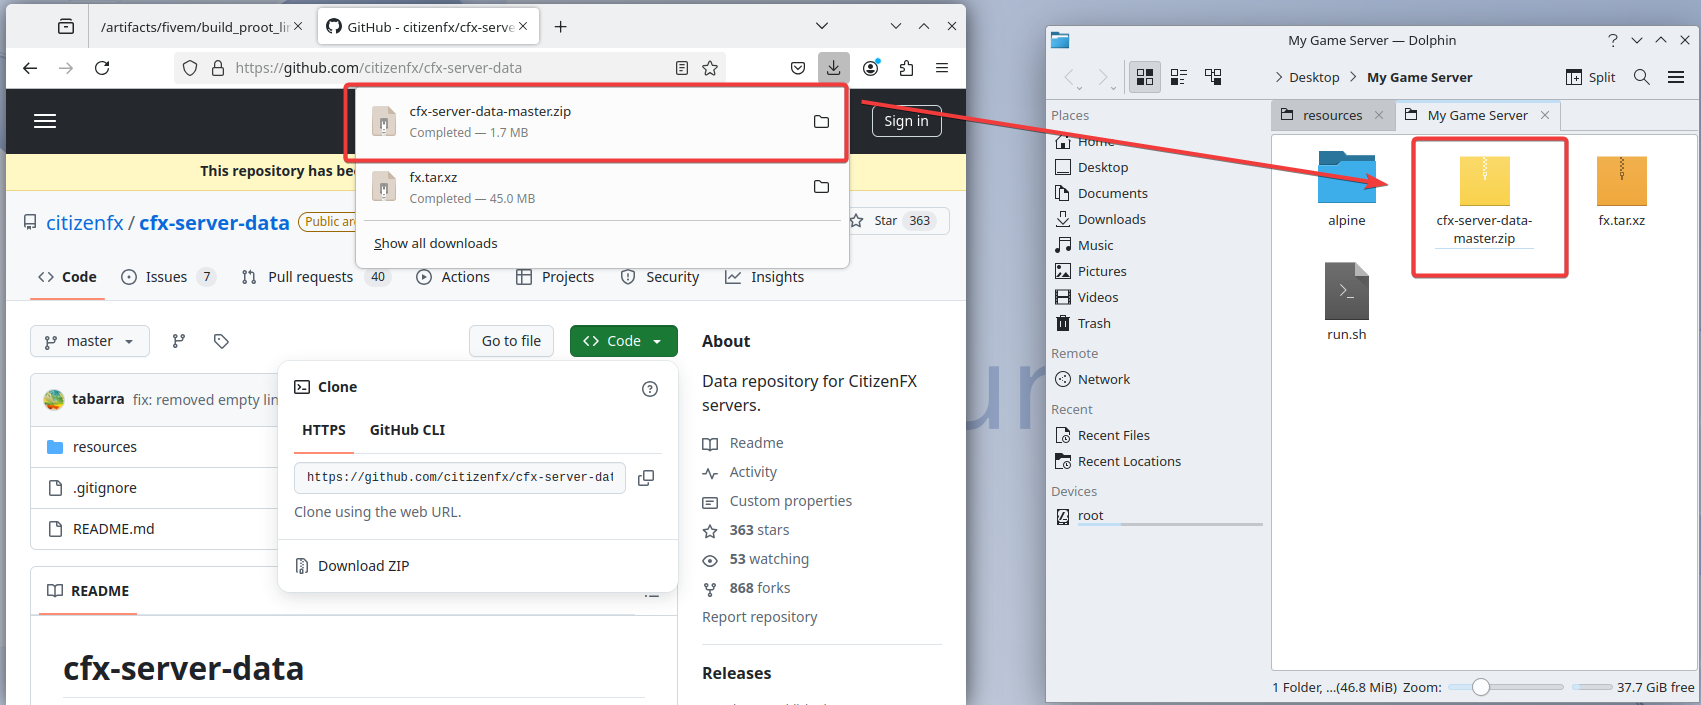
Then extract the file to "My Game Server" by first right clicking on the "cfx-server-data-master.zip" file. In the same way as before, that is, if you have had problems with Engrampa, execute these commands in the terminal.
cd Desktop
cd Minun\ Pelipalvelin
unzip cfx-server-data-master.zip
If Engrampa worked with your, use it to extract the files as done in the following.
Get a licence key:
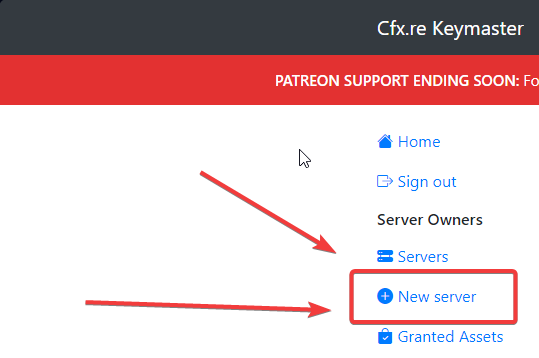
Go to the Keymaster website.
Tap the "New server" button on the site:
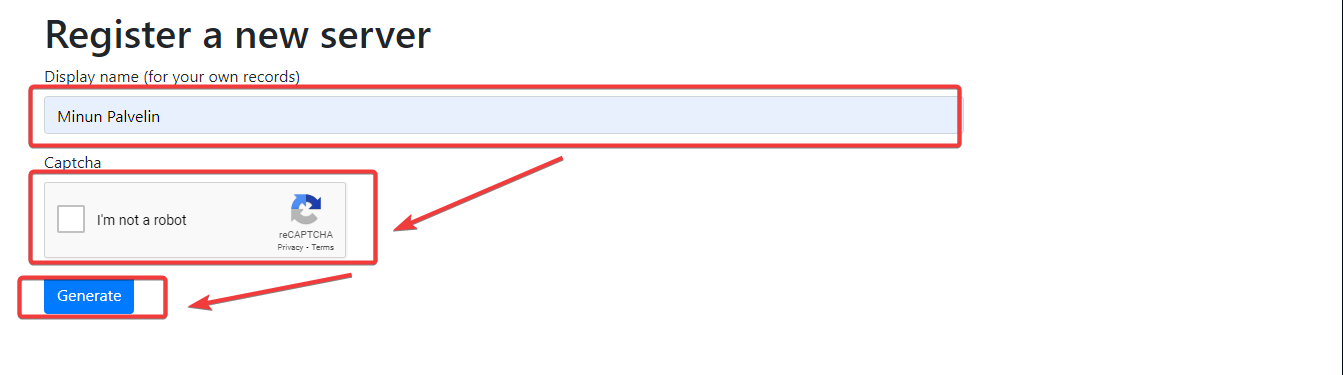
In the next window, enter the desired server name and then do the Cpatcha human test and then tap "Generate"
Step 4: Set the firewall settings
Tap the windows key on your keyboard or open the desktop menu with your mouse and type "Firewall" in the search field.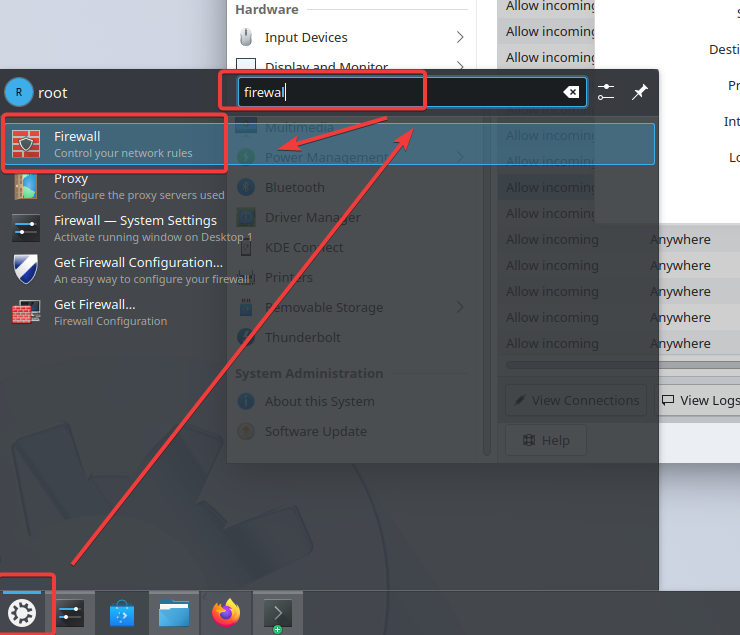
Then when you get to the firewall management window tap on the "+ Add Rule" button and you will be presented with "Create A New Firewall Rule" in this window click on "Advanced".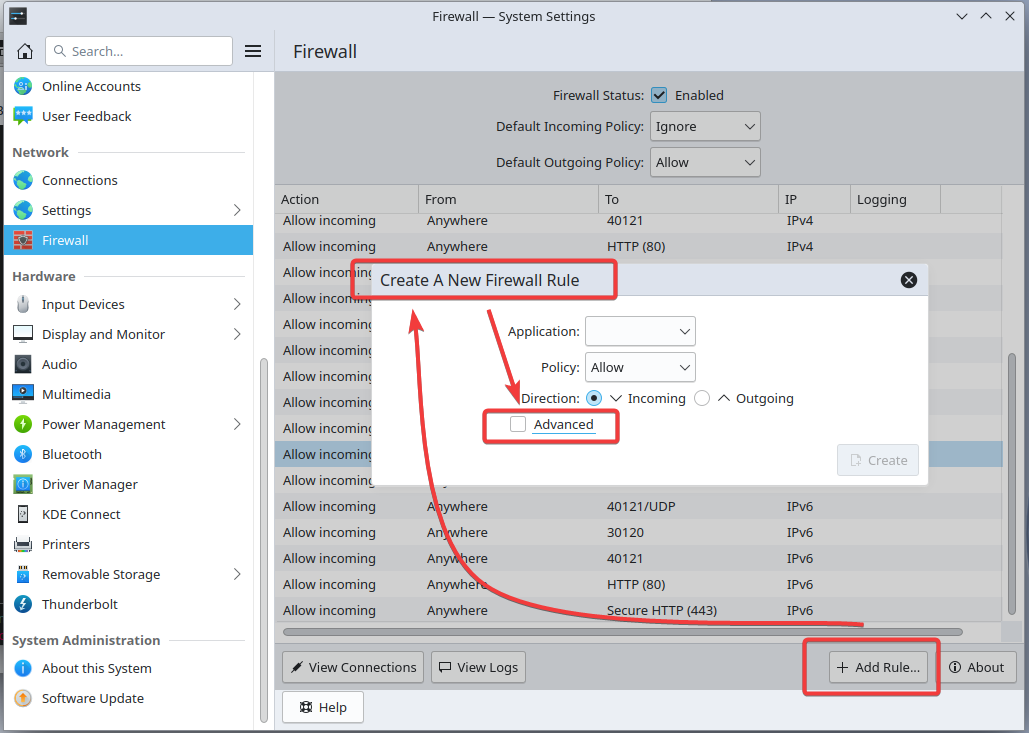
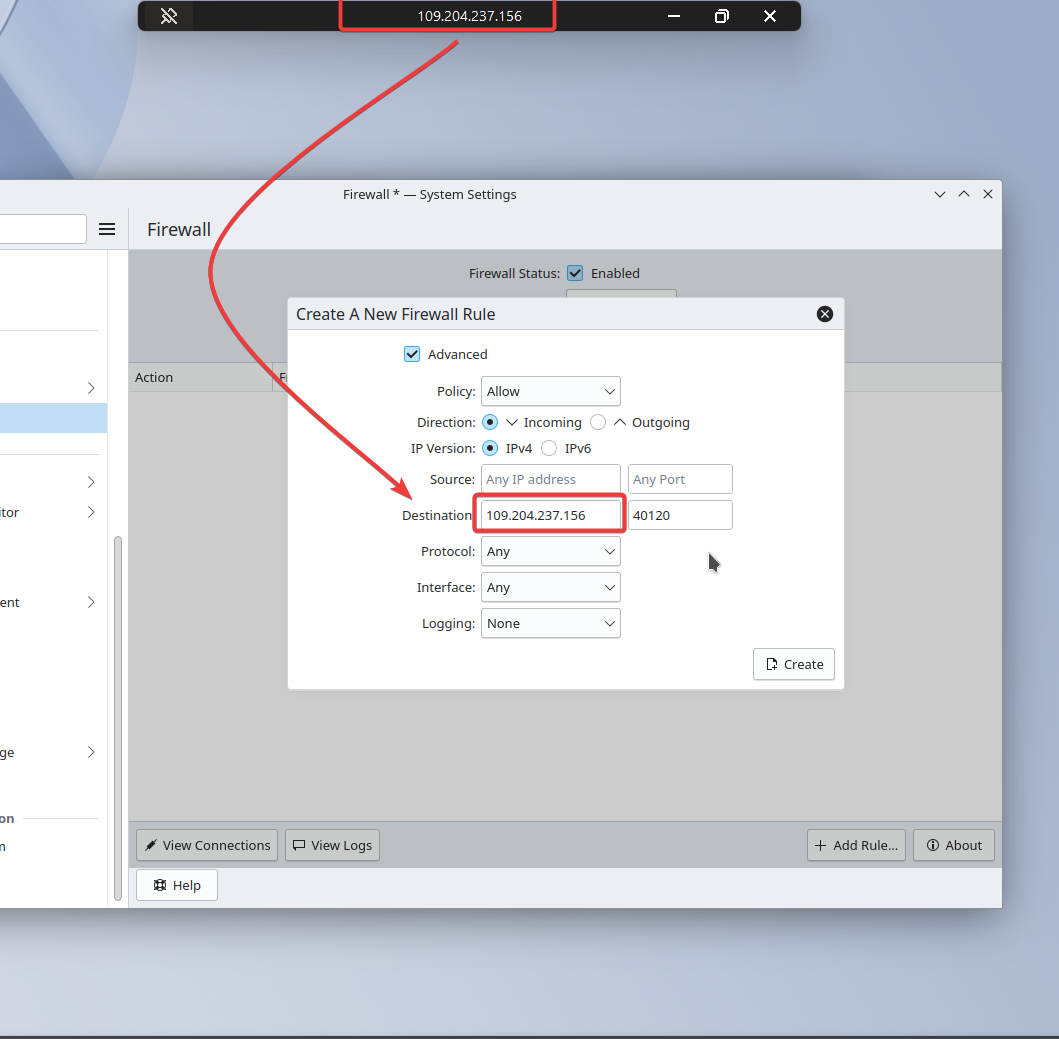
You will need to enter the IP address of your virtual machine in the "Destination" field, which you will see in "Remote Desktop Connection" at the top of the application. You will also need to enter the port you want to use to manage txAdmin in the second box next to the address. Next, enter the server information as follows: select the "incoming" circle so that it lights up blue. I also recommend using the "IPv4" settings.
First, add the Incoming ports:
Add another port: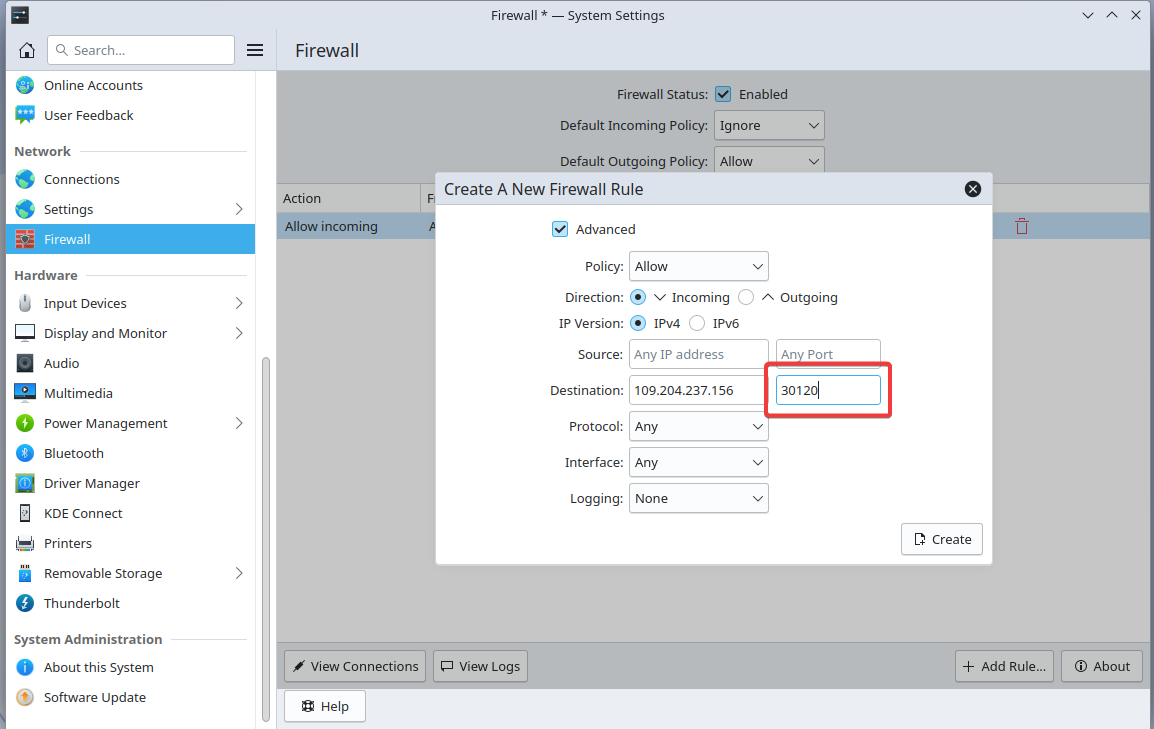
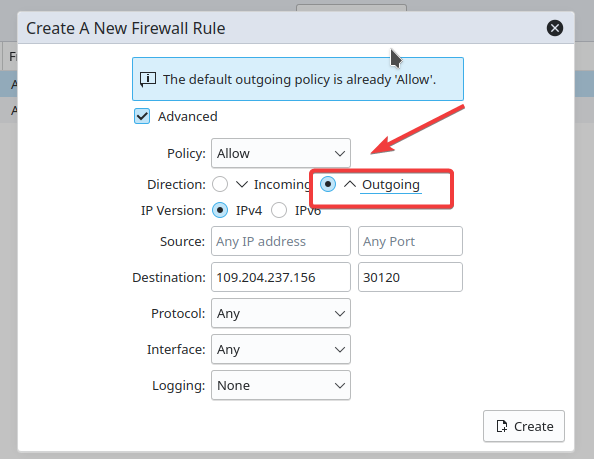
Next, add the "Outgoing" ports. Select so that the circle next to "Outgoing" lights up blue.
Then add another port for outgoing and that's it: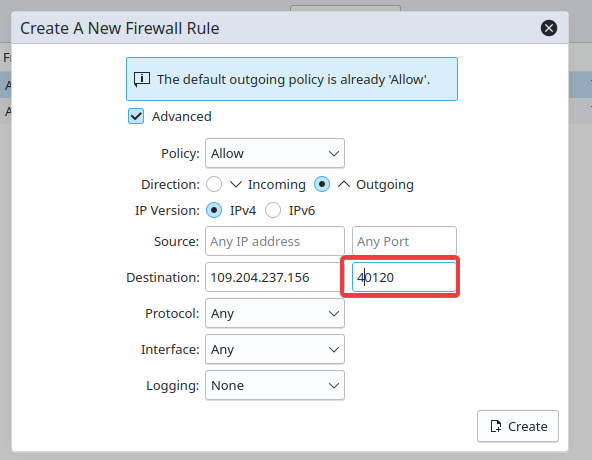
If this does not work you can also set the settings for the seal by entering them into the terminal, the "Konsole" application which you can find by searching for the following commands:
Open "Konsole"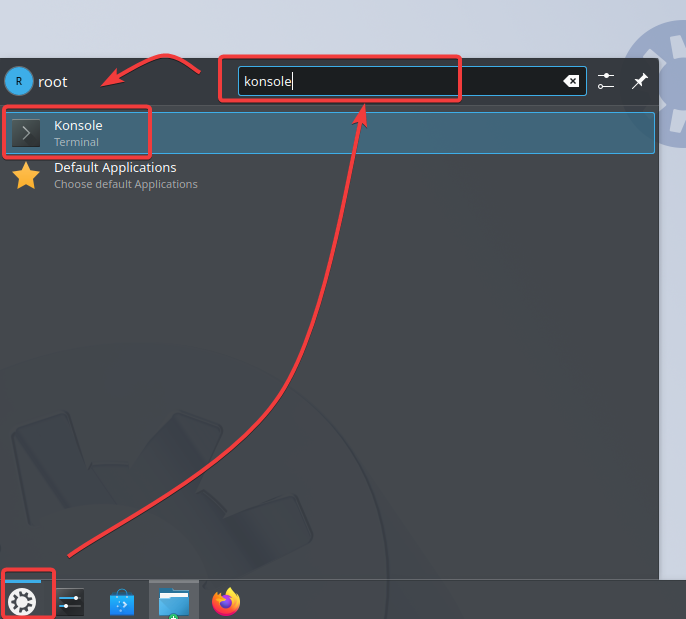
open ports:
sudo firewall-cmd --add-port=30120/tcp --permanent
sudo firewall-cmd --add-port=30120/udp --permanent
sudo firewall-cmd --add-port=40120/tcp --permanent
Reload firewall to apply changes:
sudo firewall-cmd --reload
Verify the open ports:
Step 5: Start the server enable txAdmin
Right-click on the "run.sh" file and tap "Run In Console".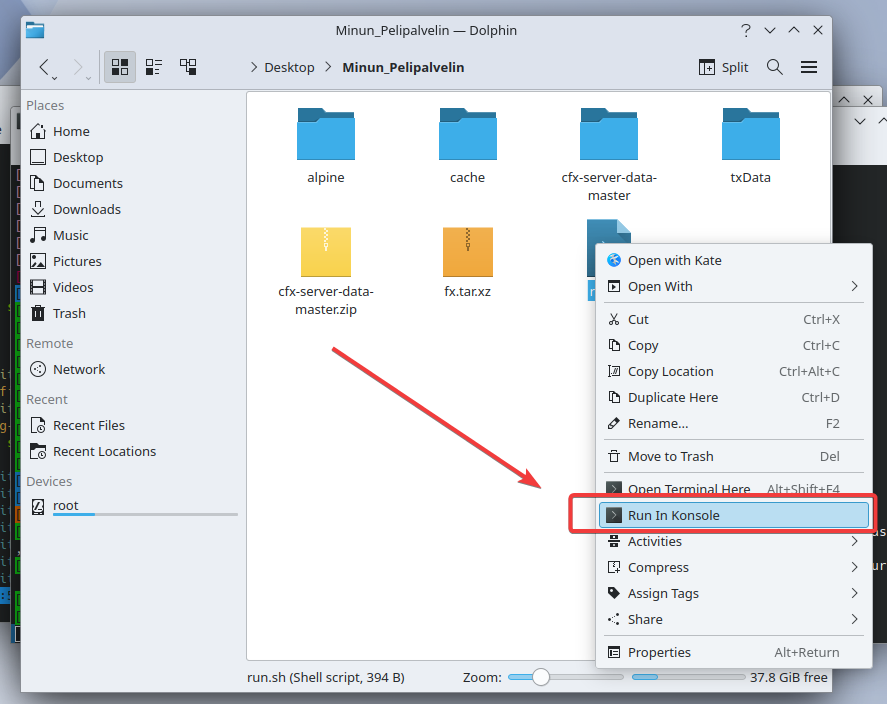
Then your "terminal" should look like this for you in the next step we'll configure the server using "txAdmin".
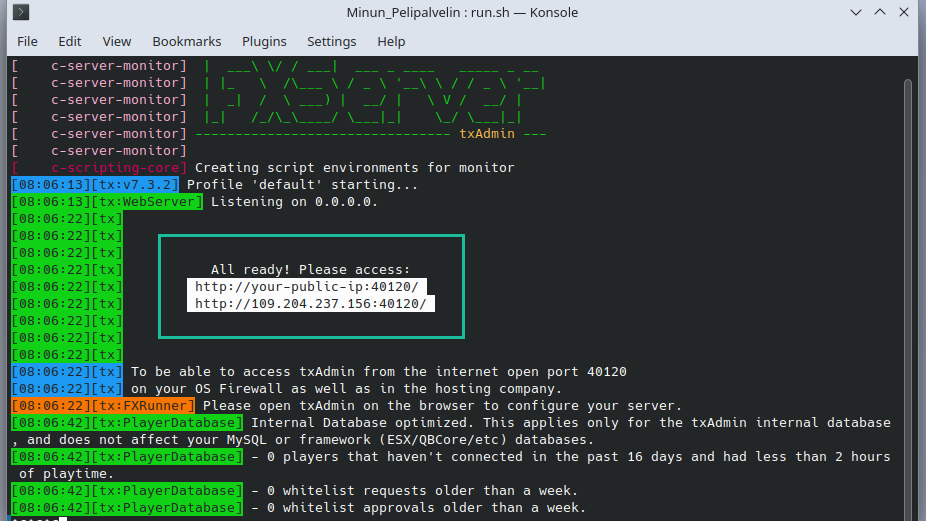
Open the txAdmin browser interface: Go to the browser at:
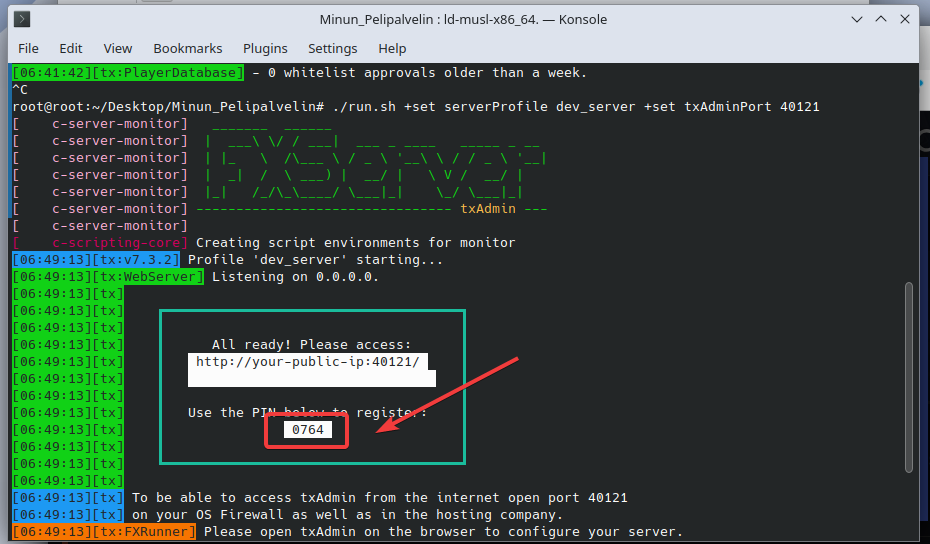
In the following screenshots, do the steps in the order shown in the screenshots first copy the "PIN code" provided by the Console and paste it into the "code field" of the second screenshot.

Then once you are logged in you should be presented with the following window where you can manage the server name and other bits and pieces of information.

Then once you have passed step one you will need to paste in your "license key". The one you got from the "Cfx.re Keymaster" website.
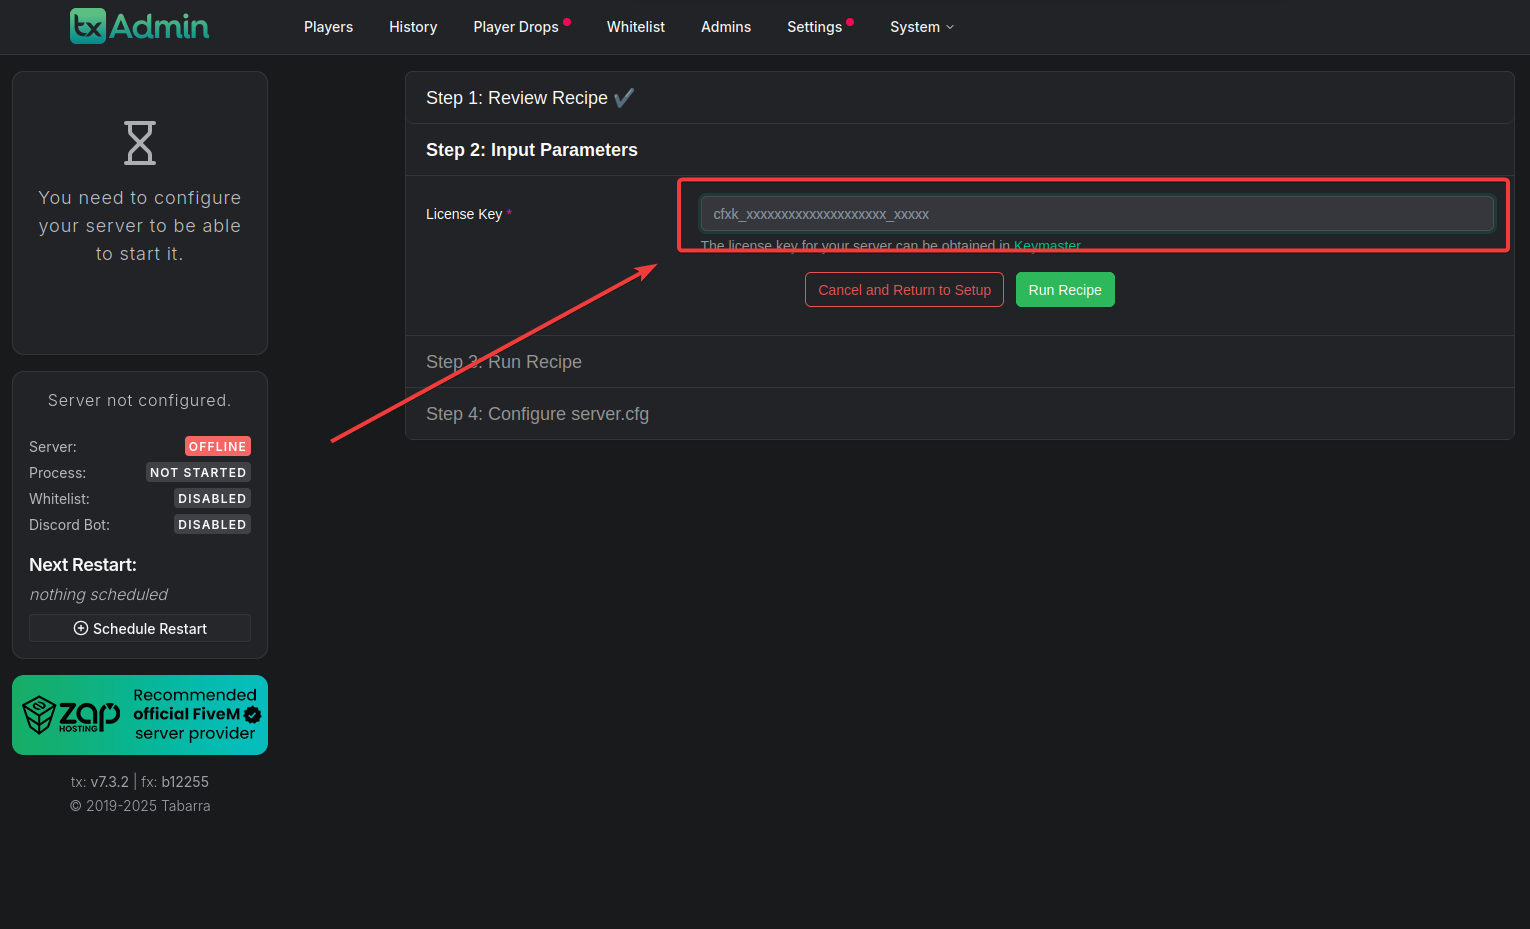
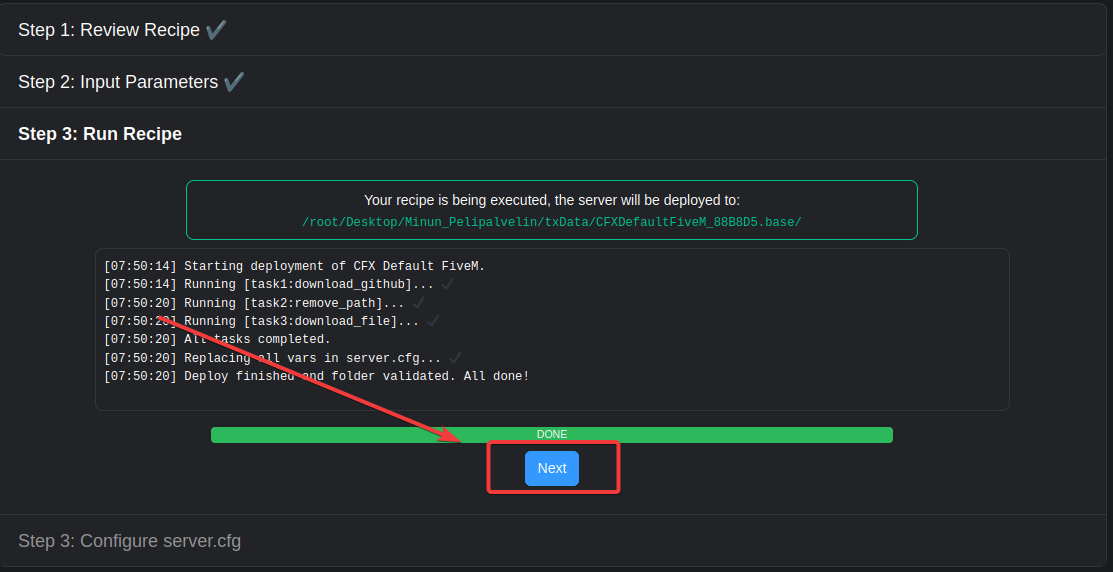
After you have pasted your license key into the text field tap the "Run Recipe" button then tap the "Next" button.
Then your server should start up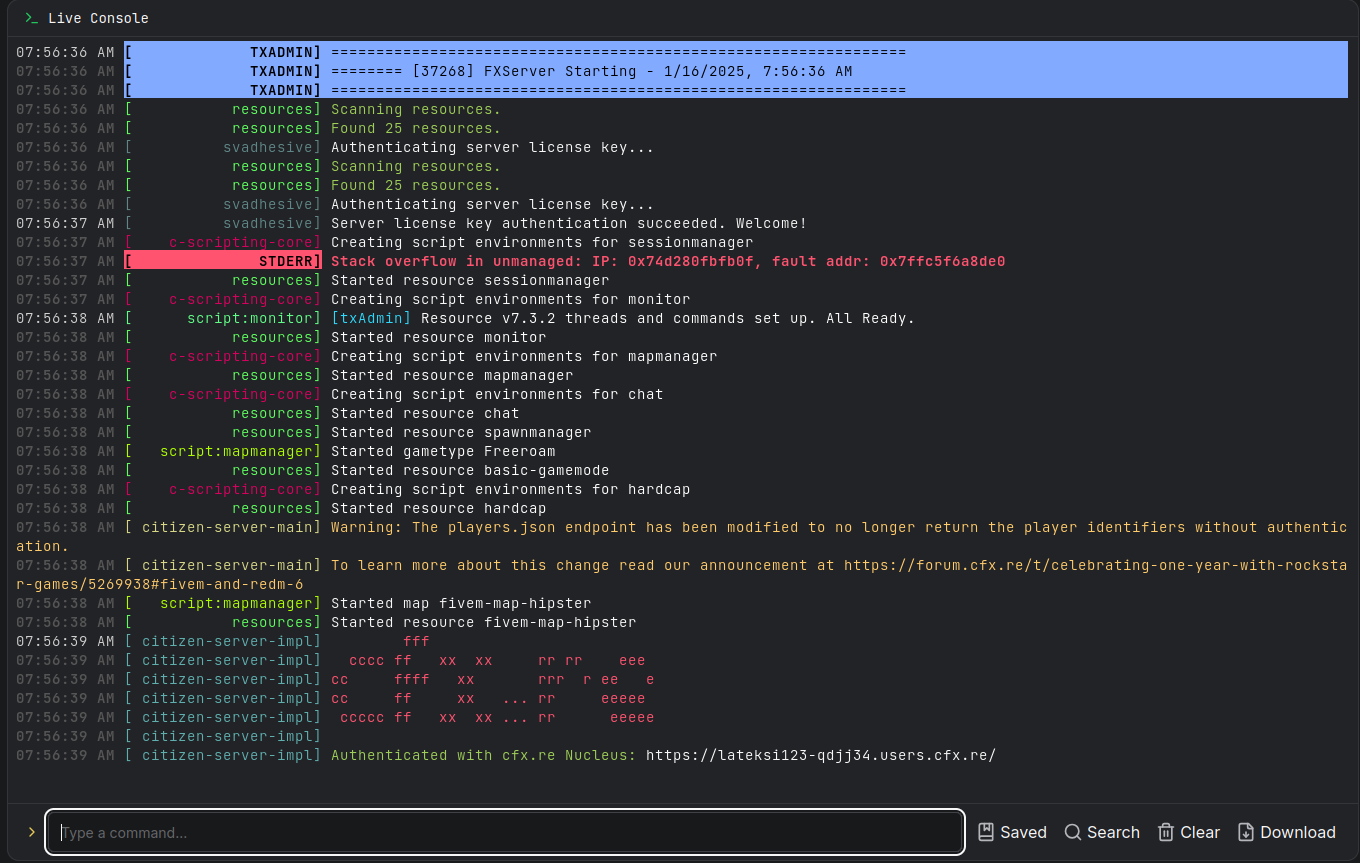
To connect to your server from the FiveM™ application, you need to press F8 and type connect IP:Port, for example.
connect 109.204.237.156:40121This IP and port must be the same as the one you used to access the txAdmin page to access your server.
Now you should now be able to connect to your Game Server.
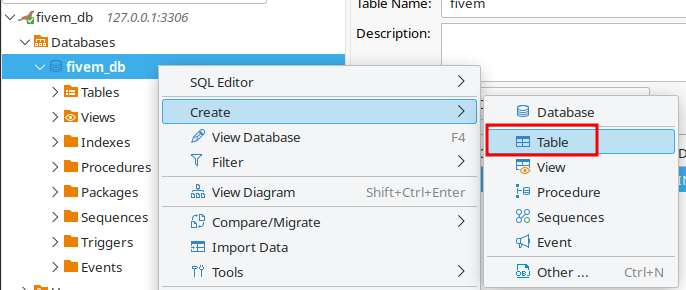
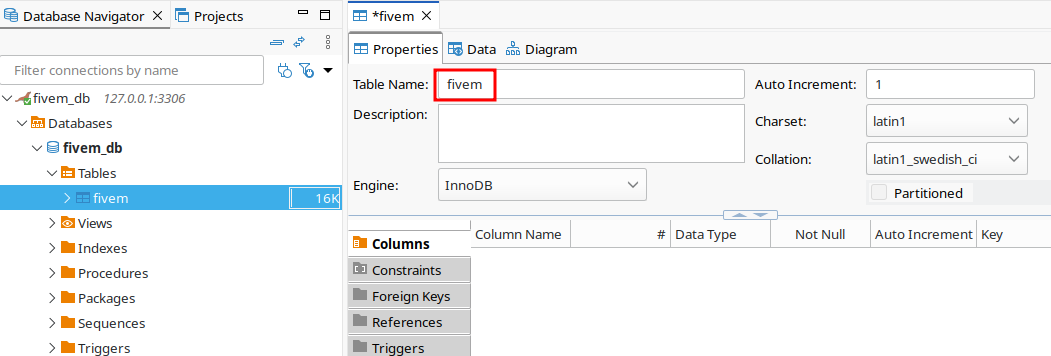
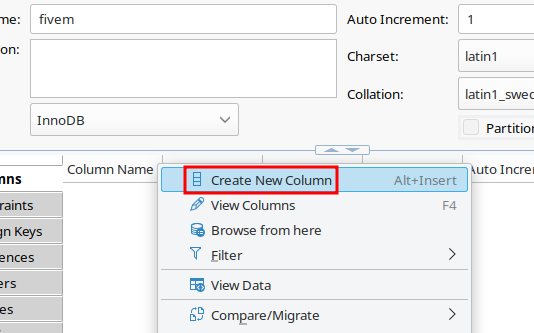
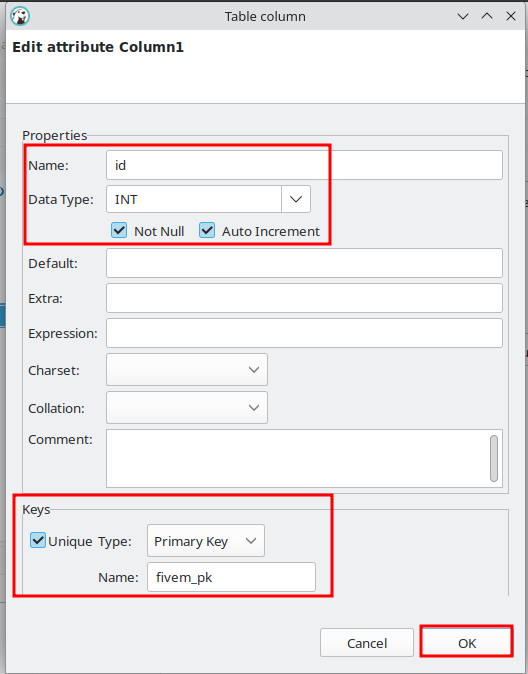
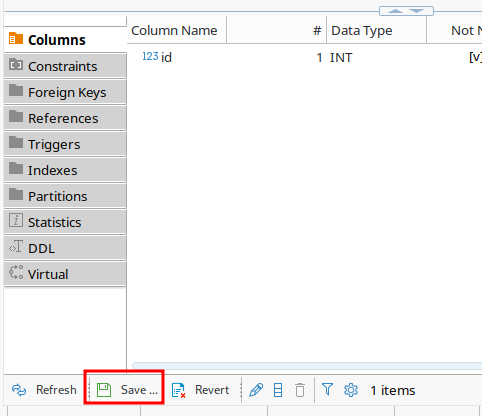
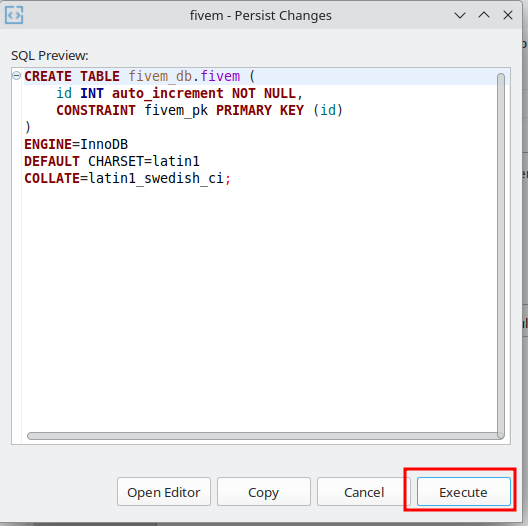
step 6 adding a database to your server
install the database
sudo dnf install -y mariadb mariadb-server
Start and enable the database service:
sudo systemctl enable --now mariadb
Log into your database:
mysql -u root -p
Create a user and a database:
CREATE USER 'fivem'@'127.0.0.1' IDENTIFIED BY 'YourPassword';
CREATE DATABASE fivem_db;
GRANT ALL PRIVILEGES ON fivem_db.* TO 'fivem'@'127.0.0.1' WITH GRANT OPTION;
EXIT;


Sitten mene FiveMBasicServer kansioosi ja avaa server.cfg sinne sinun pitää lisätä tämän näköinen pätkä:
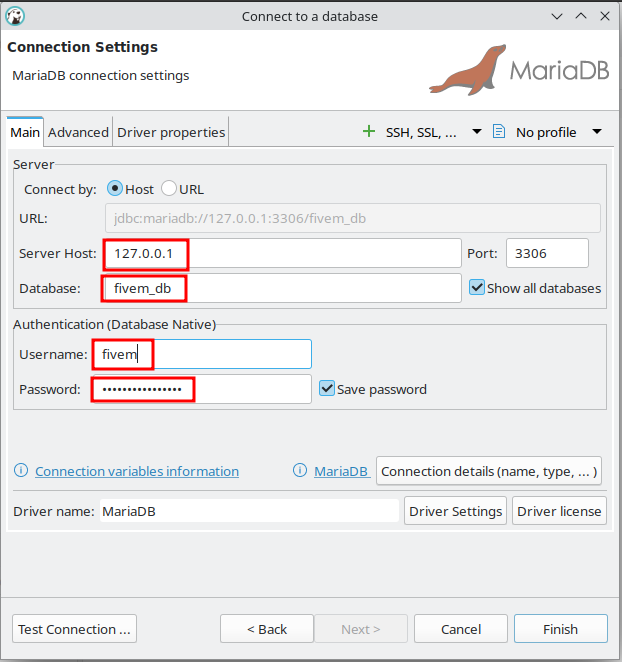
set mysql_connection_string "user=Database user;password=that user's password;host=database IP;port=database port;database=database name"

## e.g.
set mysql_connection_string "user=fivem;password=1234;host=127.0.0.1;port=3306;database=fivem_db"
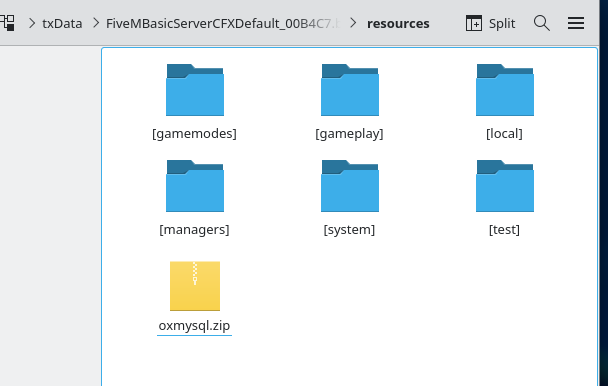
Once you have added that, also include this in the same file—this allows us to put things in a separate file that we want to run when the server starts:
exec resources.cfg
ensure oxmysql
Now, when you start your server, you should see something like this, which means your database has been successfully connected
![]()


